
This guide is for developers. It shows where each kind of project goes on shared hosting and the settings that most often cause trouble. We host the app, but writing and debugging its code stays with you or your developer.
On this page
Which plan you need
| Project | Plan |
|---|---|
| React, Vite or other static build | Standard or Premium |
| Laravel or other PHP | Standard or Premium |
| Node.js, Next.js or Python, lightweight | Premium |
| WebSockets, bots, Docker, always-on services | VPS |
More detail is in What Each Yegara Hosting Plan Can Run.
React, Vite or another static build
- Build the project on your own computer:
npm run build. - Upload the contents of the
distorbuildfolder topublic_html, so thatindex.htmlsits directly insidepublic_html. - If the app uses client-side routing, create a file named
.htaccessinpublic_htmlwith the rules below. Without it, refreshing any page other than the home page gives a 404 error.
<IfModule mod_rewrite.c>
RewriteEngine On
RewriteBase /
RewriteRule ^index\.html$ - [L]
RewriteCond %{REQUEST_FILENAME} !-f
RewriteCond %{REQUEST_FILENAME} !-d
RewriteRule . /index.html [L]
</IfModule>
Do not run the build on the server. A build uses many processes and can push your account over its limit.
Laravel
- Upload the whole project, including the
vendorfolder, or runcomposer installin the Terminal. - Laravel serves from its
publicfolder, while your domain serves frompublic_html. The simplest fix is to put the project inpublic_htmland add this.htaccessfile there:
<IfModule mod_rewrite.c>
RewriteEngine On
RewriteRule ^(.*)$ public/$1 [L]
</IfModule>- Create the database and put its name, user and password in the
.envfile, withDB_HOST=localhost. See How to Create a Database and Import an SQL File. - Set
APP_ENV=productionandAPP_DEBUG=false, and setAPP_URLto your domain with https. - Choose the PHP version your Laravel version needs. See How to Change Your PHP Version.
- Make sure the
storageandbootstrap/cachefolders are writable (755).
Files that start with a dot, such as .env and .htaccess, are hidden in File Manager. Click Settings at the top right and tick Show Hidden Files.
Node.js (Premium)
- In cPanel open Setup Node.js App and click Create Application.
- Choose the Node.js version, the application root (the folder that holds your code), the application URL and the startup file, for example
app.js. - Upload your code to the application root, without the
node_modulesfolder. - Back in Setup Node.js App, click Run NPM Install.
- Add your settings under Environment variables instead of uploading secrets in a file.
- Click Restart after every change to the code or the variables.
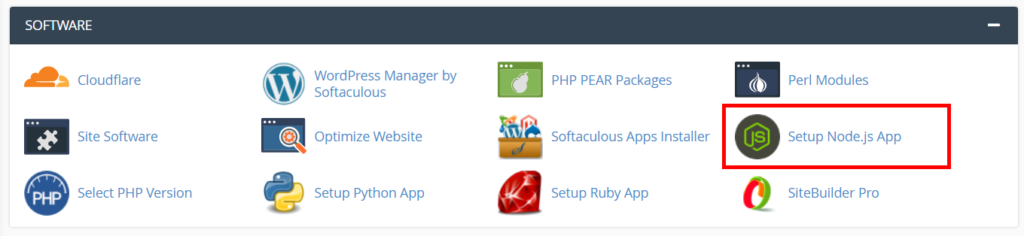

A first walkthrough with screenshots is in How to Create a Node.js Application on Yegara Host cPanel.
📘 What Node.js on shared hosting is for
It suits small APIs and lightweight sites. The app listens on the port cPanel gives it, so do not hard-code a port. PM2, WebSockets and services that must run all the time need a VPS. For MongoDB, connect to an outside service such as MongoDB Atlas.
Deploy with Git
On Premium hosting, open Git Version Control in cPanel to clone a repository and pull updates, or use git pull in the Terminal. Deploying from GitHub Actions or other cloud runners over SSH or FTP often fails, because the firewall blocks many automated cloud IP ranges. Pull from the server side instead. See SSH, Terminal and Cron Jobs on Your Hosting.
Stay within the limits
- Each account can run 100 processes. Builds,
npm installloops and apps that restart again and again use them up and take the site down with a 503 error. - Each account can hold 20 database connections at the same time. Close connections, or use a small connection pool.
- Add time-outs to calls your app makes to other services.
If your account gets stuck, clear it yourself: see Resource Limits and Stuck Processes.
