

Most websites and applications keep their data in a database. This guide shows how to create a MySQL database and its user in cPanel, and how to import an existing .sql file into it.
Create the database and its user
Step 1. Log in to cPanel. You can open it from your Yegara dashboard or at yourdomain.com/cpanel.

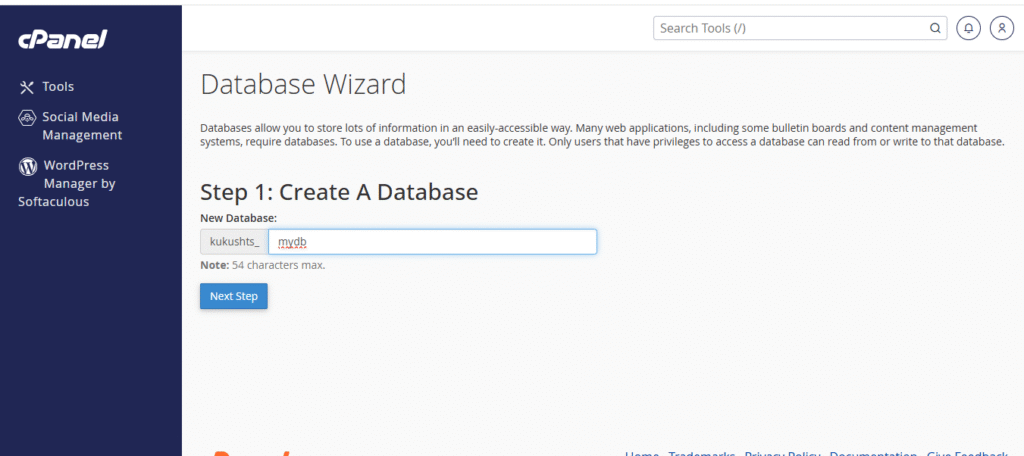
Step 2. In the Databases section, click MySQL Database Wizard. Type a name for the database, for example mydb, and click Next Step.
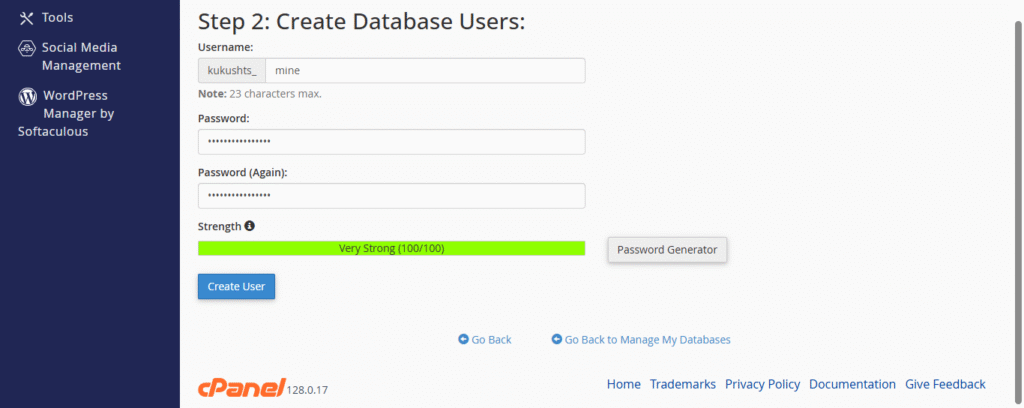
Step 3. Type a username and a strong password for the database user, then click Create User.
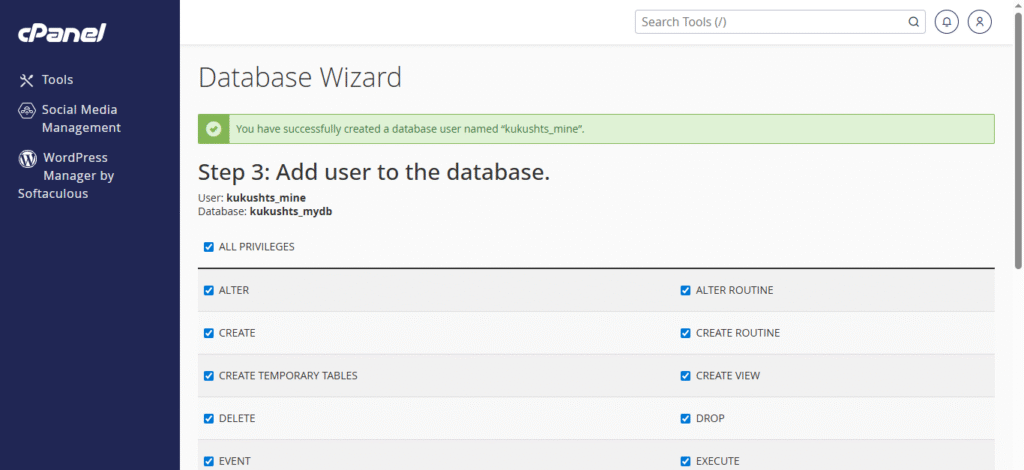
Step 4. Tick All Privileges and click Make Changes. The user can now use the database.
📘 Write these down
Your site’s configuration needs the full database name and the full user name, including the prefix cPanel adds in front (for example username_mydb), the user’s password, and localhost as the host.
Import your SQL file
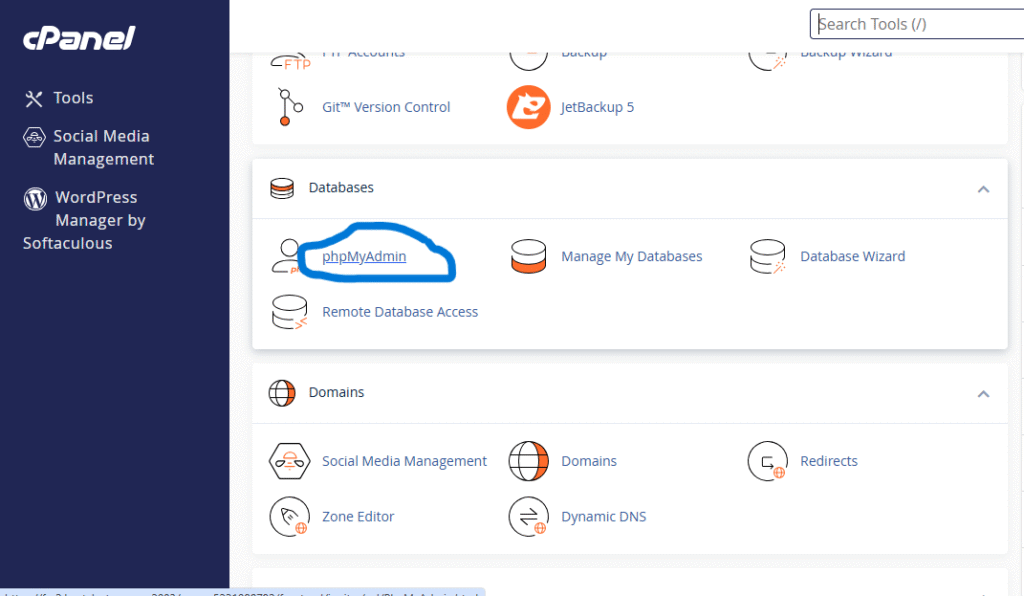
Step 5. Go back to the cPanel home page and, in the Databases section, click phpMyAdmin.
Step 6. In the left column, click the name of your new database.
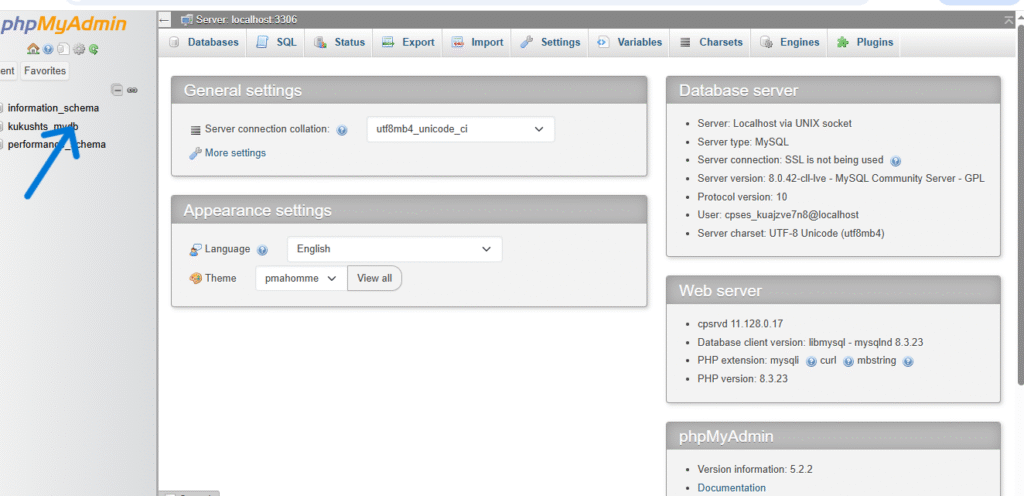
Step 7. Open the Import tab, click Choose File and select your .sql file. Scroll down and click Import.
When the import finishes, phpMyAdmin shows a green message and your tables appear in the left column.
If the import fails
- “No database selected”: you did not click the database name in the left column before importing.
- The file is too large: compress it as
.sql.zipor.sql.gzand import that file. - “Table already exists”: the database is not empty. Import into a new, empty database.
