
On this page
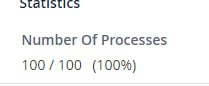
If your hosting account has hit its maximum number of running processes (NPROC limit), you won’t be able to open a terminal or SSH session to fix it yourself. This tool lets you request that stuck processes be automatically cleared — no terminal access required.
Login to your yegara account and navigate to your packages and click on manage.
Step 1: Add &q=kill to the page URL
The kill request tool is hidden by default and only appears when &q=kill is added to the end of your product page URL.
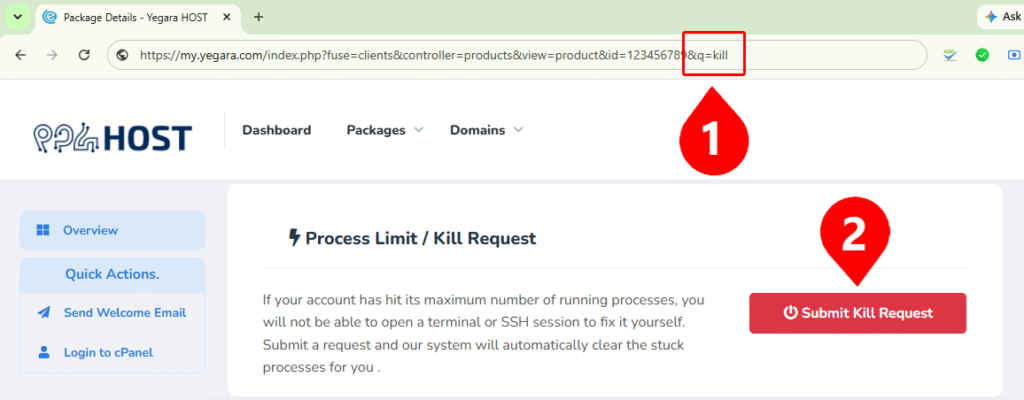
Step 2: Click “Submit Kill Request”
Once the page reloads, scroll down — you’ll see a new card titled Process Limit / Kill Request with a red Submit Kill Request button.
Confirm the request
A confirmation window will pop up when you Click “Submit Kill Request” . Click Yes, Submit Request. You’ll see a confirmation message with your request number.
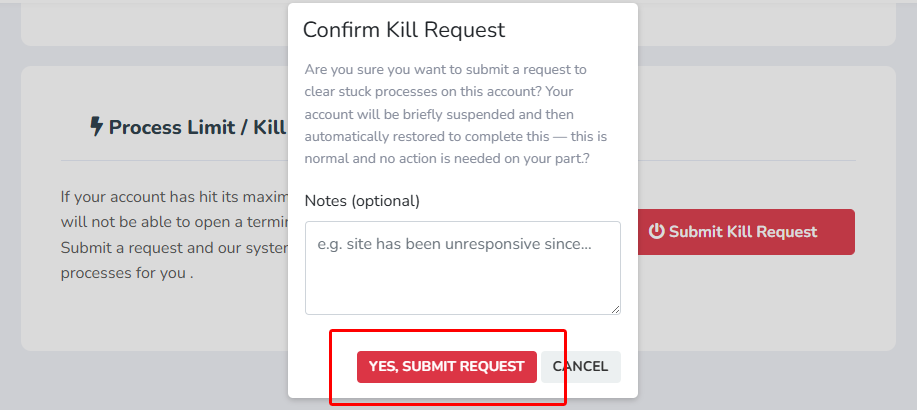
Your request is now queued. It’s automatically picked up and processed by our system on its next scheduled run — usually within a few minutes.
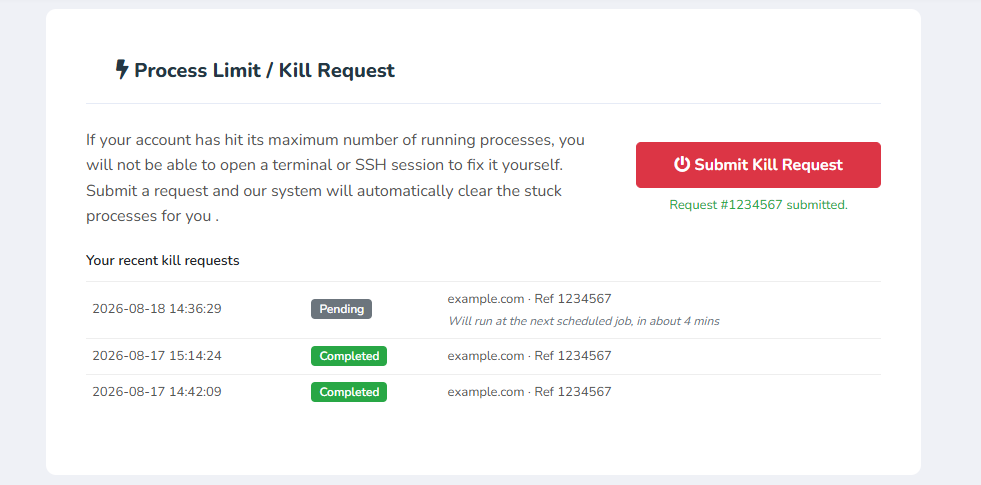
To Check on your request
To check the status of a request you’ve already submitted, just click Submit Kill Request again. Before anything new is created, you’ll see a history of your recent requests, each marked with one of the following:
| Status | Meaning |
|---|---|
| Pending | Queued and waiting — will run automatically on the next scheduled job. |
| Completed | Your stuck processes were successfully cleared. |
| Failed | Something went wrong — please contact support and reference the date/time shown. |
If the card does not appear, or the request fails
- You do not see the Process Limit / Kill Request card. Check that you are on your package page. In the top menu of your dashboard, open Packages, then My Packages, and click your package. Add
&q=killto the end of that page’s address and press Enter. - The request stays on Pending for more than 15 minutes, or shows Failed. Message us on Telegram with your domain name and we will clear the processes by hand.
- The processes fill up again soon after they are cleared. Something on your site keeps starting them, and clearing them again will not fix that. See Resource Limits and Stuck Processes to find the cause.
- Your Yegara dashboard does not open. See Can’t Open yegara.com, Your Dashboard or cPanel?
Good to know: request limits
This tool is provided as an emergency switch . To keep this tool from being overused, you can only submit 1 request per 30 min.
After killing your running processes we recommend that you implement a cronjob so that it will automatically run and terminate any struck processes for you .
Still stuck after a completed request, or seeing repeated failures? Contact support so we can look into it further.
