

An SSL certificate is used to establish an encrypted connection between a server and a client, like a web server and a browser, ensuring secure communication.
On this page
SSL certificates protect sensitive information from being intercepted by hackers or malicious actors.
1/ Install SSL Certificate
Your cPanel account at Yegara Host comes with a free SSL. The certificates are automatically installed for you within an hour or two. But some people immediately need an SSL certificate before the auto-installer runs, you can follow the steps below to install it immediately
a. In your cPanel go to SSL/TLS Status under Security

b. Click on RUN AutoSSL
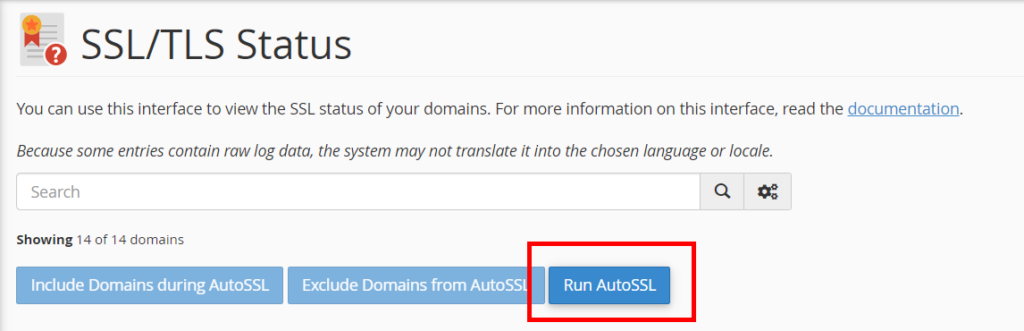
This may take a few minutes to run, at the end you will have an SSL certificate for your domain.
2/ Force your site To use HTTPS
Now that you have a valid SSL issued for your domain, you will have to force your site to use HTTPS. Most CMS including WordPress has a built-in way to handle that.
Option 1: WordPress
a. Login to your WordPress Dashboard
b. go to Settings » General page.
c. update your WordPress and site URL address by replacing http with https.
d. Then click on “Save Changes“

Option 2: Force SSL In Your .htaccess File
As a general rule of thumb, your .htaccess file should be the main place to set redirects. Add the below code to your .htaccess file and your site should start to use HTTPS
<IfModule mod_rewrite.c>
RewriteEngine On
RewriteCond %{HTTPS} off
RewriteRule ^(.*)$ https://%{HTTP_HOST}%{REQUEST_URI} [L,R=301]
</IfModule>
Option 3: cPanel Built-in Force HTTPS
cPanel has recently added a feature that will allow you to do that easier. By using this option the redirection is built into the domain’s vhost configuration.
a. In your cPanel open Domains menu

b- click the slider switch under the Force HTTPS Redirect column next to the domain you want to enable.

That is it, Now your site should be using HTTPS .
You are Done!
If you are not able to issue SSL Certificates , make sure that your domain name is pointing to the cPanel.
- If you are using cloudflare , the SSL Certificate will be automatically issues for you by cloudflare . cPanel will not issue additional certificate.


Leave a Reply